
Treatment Note Basics
Treatment notes in Instinctive Notes are designed to be blazing fast and easy to use. Follow along with this guide while you take your first treatment note and see all the key features Instinctive Notes supports.
Step 1: Log into the Instinctive Notes App
Launch Instinctive Notes on your device by tapping the app icon. If this is your first login then you will see the login screen.

Go ahead and enter your email address and the password you selected during activation and tap the Login button immediately below them.
You will be presented with a quick walkthrough which provides an overview of the Instinctive Notes App and highlights important features.
When you login, the Instinctive Notes App collects all the information you need to take your clinical notes. Specifically, you will get:
- All your client names
- Your appointments booked for the next 7 days
- The client details associated with the appointments
As you start using Instinctive Notes further information will be automatically downloaded:
- The last 5 clinical notes you’ve taken for each of the clients
- Past appointments where no clinical note was recorded (past 30 days only)
- Draft notes that have been recorded but not yet completed
Step 2: Review Appointments
After login you will see the Appointments list. All appointments booked in your source system or uploaded will be listed here.
If you have no appointments booked for today then this list will be empty. You can tap future days at the top of the screen to see your appointments booked for the next 7 days.

Tap any appointment in the Appointments list to take a clinical note for that appointment.
Step 3: View Client History
The first stop in note taking is the client history. All previous treatment notes recorded for the client will be displayed (if none have been recorded this list will be empty).

Record a new treatment note by tapping the "+" button.
Step 4: Record a Treatment Note
You start your treatment note on the overview screen which provides a summary of all the details you have recorded for this note.
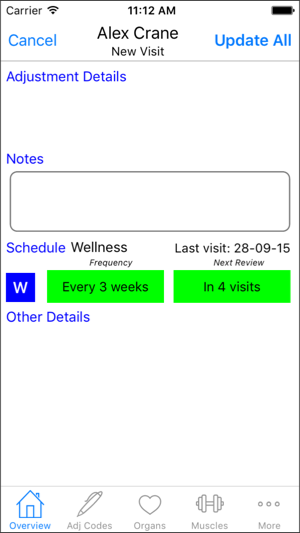
If this is your first treatment note for a client then the overview screen will be blank.
If you have taken a previous treatment note then the codes you selected previously will be copied over into this note automatically to make recording your treatment note faster.
The summary screen is gathered automatically from the details you record for the treatment note. The only information you can add directly to this screen is in the free text Notes section.
Other treatment note information recorded using the tabs along the bottom of the screen, they include Adjustment Codes, Organs, Muscles, Limbs, Cranials and Supplements (the last three are under the More tab).
Working left to right go ahead and start recording detailed notes with simple taps and selections.
Entering Adjustment Codes
The Adj Codes tab allows quick selection of standard, specialist and custom codes (see our custom codes guide).
You may select three specialties from Diversified, Gonstead, Applied Kinesiology, SOT and Thompson.
Specialties can be set in your profile, tap "More" and then "Your Name" to make any changes, and in the screen below Diversified, AK and SOT have been selected.

On the diversified codes tab you can tap once to select (or deselect) a code, or double tap a code to select the anterior version of the code. For example in the screen shot above, if you double tapped on the C1RP it will automatically become C1RA.
In the Gonstead code screen all codes with double tap options are underlined. All other code templates have no double tap.
You can go ahead and quickly pick the necessary codes for your treatment note.
When you return to the overview tab you will see the codes you have selected in the Adjustment Details section.
Now you can move on to recording other information.
Record Other Information: Muscles, Organs, Limbs, Cranials
Quick pick lists are available for recording other information. Simply select the area you wish to record and tap one or more items from each list. The Muscles and Limbs lists have a secondary information list which appears when a muscle or limb is selected.


ere the Abdominals Rectus muscle has been selected, with additional info Bilateral and Soft Tissue Therapy selected on the info screen.
Under the More tab you have access to Cranials, Limbs and Supplements.

All this information is displayed directly on the Overview screen so you can quickly see the other details you have recorded for any note that you have taken.
At this point you've recorded a substantial amount of detail for your treatment which only needed a few taps to achieve. Much faster than using a desktop or web note taker, and much more than could fit on an index card!
You could record much more, including methods used with adjustments and schedule information for your assistants to see, but for now let's keep it simple and cover those topics at a later time in more detail.
Saving Your Treatment Note
Tap the Overview tab in the bottom tab bar to return to the overview screen. You will see all the information you have recorded in a single concise screen.

To save the treatment note tap on Update All at top right of the screen. The app will send this note to the Instinctive Notes web service, and remove the appointment from your Appointments list. You will automatically return to your Appointments list ready to take your next clinical note.
Finishing Up
As you can see, taking a treatment note is a simple process. It's fast and easy so you can get your treatment notes done quickly, without any of the pain of old note taking systems, and get back to concentrating on your clients and growing your practice.
There is much more to taking notes that this first guide. So head back to the list of guides to see what else Instinctive Notes can do for you.